Tuesday, May 12, 2015
Ginger Jeans
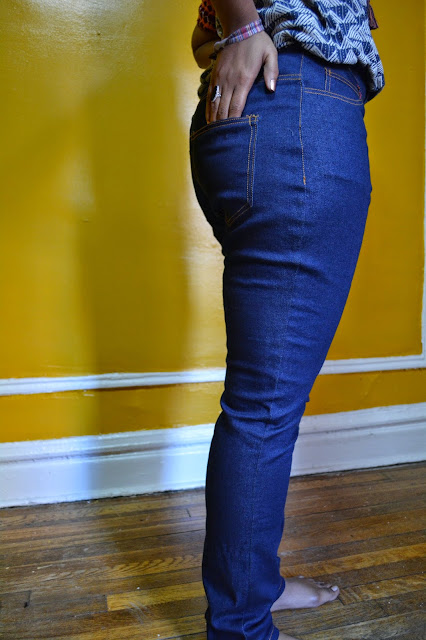
I had been planning on making a pair of jeans for so long. back in November I bought the praised ginger jeans pattern and slowly gathered all the supplies I needed. I ended up with loads of denim, 4 different zippers,brass and gunmetal jeans buttons,rivets, and two different colors of top stitching thread. like seriously I went all out. But it wasn't until this month that I had the courage and inspiration to tackle this project. I decided on the high-waisted version of course.
Starting with the fit, according to the size chart I knew I was in the size 10 range in the waist but I would need more room in the hips. So I graded the pattern out to a 12 at the hips and back to a 10 below the knee. I was done cutting out the pieces before it occurred to me I might need a full seat adjustment,so I had no choice but to hope I didn't need one.
all in all I really enjoyed making these jeans, the top stitching was intimidating at first but some practice made it go pretty smoothly. the front fly zip which I thought would be so hard was made relatively painless thanks to the amazing instructions and the sew-along on the closet case files blog. I am definitely going to make another pair and next time I think I will take in the waist a bit more, I don't think it's quite snug enough
Moneta in New york
I bought this black and grey Houndstooth fabric on a whim from one of my favorite shops, wanderlust fabrics almost a year ago. I stashed it of course like sooo many other yards of fabric I've bought,waiting for inspiration to hit and tell me what to do with it.That time came in march shortly after I moved from Connecticut to New York city!. I was looking for a job and Fabric shopping had come to an end.I was soaking up tons of vintage and retro looks,watching black and white movies with the hubby and I thought the untouched Houndstooth and the Moneta dress I took so long to try would be the perfect pair.
I made it a bit more retro with the peter pan collar and I also added bucket pockets with contrasting trim. Overall I love the look of this dress and I understand why everyone loves the moneta pattern.
Monday, January 19, 2015
Camel Toggle Coat
I finally made my Albion coat!. This project has been on my mind since the first day of fall and I am proud to say I completed it. When I picked up this pattern I loved the fact that It would have a duel use as a coat for either me or my boyfriend. I also loved the photo's and I knew I would take it on after seeing so many sewists who succesfully altered the pattern. MY first idea was to make the jacket version using an army green cotton canvas fabric. and line it with a plaid flannel.I changed my mind since I already own a jacket this color and I wanted to try a new color. I found this cheap faux wool and plaid fabric that happened to macth perfectly. I altered the pattern which sat untouched for about a month until I was finally ready to tackle it. Here it is my most advanced project yet,and my first time adding a lining to any garment. next version will most likely be made with a goregous olive green twill I have had my eye on from mood.
.
Saturday, January 17, 2015
French Retro
a few months ago I decided it was time for me to make my first jacket or coat. I had just fallen in love with this french pattern company, deer and doe. Their designs are so classic and feminine with a vintage flair!I seriously wanted to buy almost every pattern on their website. When I saw the pavot coat pattern I just had to have it,I knew it would be perfect for my first attempt at outerwear.I had initially planned on using a deep red wool, but I had trouble finding it at a price I was willing to pay... I thought "what if I ruin this expensive fabric on my first try??". So I decided to buy a herringbone wool blend coating that I found on sale for about 4 bucks a yard! Since the fabric was so cheap I thought it would make a perfect wearable muslin.I reycled the wooden buttons from an old pair of curtains and I love how well they match this fabric.The only alteration I needed to make was a small bust adjustment, after reading that this pattern was drafted for a c cup. I'm so glad I followed that advice because the fit was perfect! I will definately make this jacket again with a lining.
Subscribe to:
Comments (Atom)


